
Friday, August 28, 2009
Site issues!!! {Please read}
Well, ESS has been having issues with their site the last two weeks. To correct the problems the host had to reset the Database and a lot of recent threads were lost... this includes my "Win it before you can buy it" RAK thread for What a Hoot! If you posted previously, please post again. I'm so sorry! To make up for it, I've decided to have more than one winner. I have posted a new thread HERE. Thanks again!
Thursday, August 27, 2009
Moving Sale!
Looking for a good deal? I've decided to have a moving sale. Beginning tonight at Midnight MST and through the 31st, my entire store at STS will be 50% off!!!
This is the perfect time to shop, some of my items will be retired when my store at STS closes. I'm planning some exciting things for my grand opening at ESS. Don't forget about the kit you can win here.

This is the perfect time to shop, some of my items will be retired when my store at STS closes. I'm planning some exciting things for my grand opening at ESS. Don't forget about the kit you can win here.

Win It Before You Can Buy It!!!
I just finished my newest kit "What a Hoot!" and I love how this kit turned out! Here are the previews:


Would you like a chance to win it before you can buy it? Click HERE. (Link has been updated to new thread.)
Happy Scrapping!


Would you like a chance to win it before you can buy it? Click HERE. (Link has been updated to new thread.)
Happy Scrapping!
Tuesday, August 25, 2009
September Desktop Challenge at ESS
I'll be co-hosting the Desktop Challenge at ESS and I'm kicking it off with September's challenge.

I used my soon to be released kit "What a Hoot!" Here is a closer look:
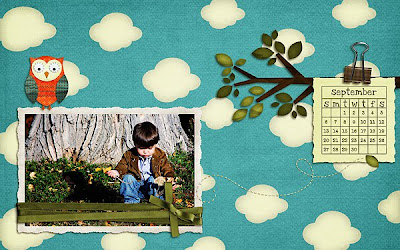
I hope you join me!
STORE UPDATE: I originally wanted to open my store at ESS on my birthday, however I've just been too busy. I moved and don't have internet at home yet. That being said I've decided to open on September 1st, my store at STS will be closing on the 31st of August. I'll have some RAK's before then.
Happy Scrapping!
Miss Tiina
I've been so busy this last month, moving into our new home. I love it, just what we were looking for. I did want to share that I am now a Lil' Missie for Miss Tiina! I wasn't planning on creating anything until September when things slow down, but this kit was really cute and I desperately needed a break!
I used "My Big Adventure" Charity Collab available September 1, 2009 at MissTiina.com
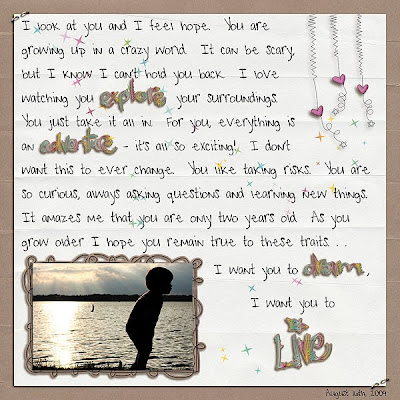
I took this picture of my sun at the lake during my birthday party. It was a great day and I took a lot of pictures I really love. I'll share them in layouts soon.
I used "My Big Adventure" Charity Collab available September 1, 2009 at MissTiina.com

I took this picture of my sun at the lake during my birthday party. It was a great day and I took a lot of pictures I really love. I'll share them in layouts soon.
Saturday, August 15, 2009
Can you believe this?!
TDC is featuring my gallery for this week's Scraplift Challenge! How awesome is that? You should go check it out, I'd love to see what you come up with.
Happy Scrapping!
Happy Scrapping!
Monday, August 10, 2009
Photo Editing Tutorial
This is a tutorial I posted a few months ago on STS' blog. I got some good feedback on it and thought I would share here too. Hope you like it.
I’m focusing on saving an “imperfect” photo. We all have them! (I work with Photoshop CS3, I’m not sure if this will work with Photoshop Elements.)
This is what my picture looked like straight out of the camera. It was really overcast so the color is a little washed out. Also, he was in a moving swing and I was shooting with Auto-Focus… as you can see the camera focused on the swing’s chains which left my son looking blurry. Look at that smile though… I had to save this picture!

The first thing you want to do is copy your picture. Take it from me- the last thing you want to do is accidentally save over your original file. Working with your copy, duplicate your photo layer two times and change the blending mode on both layers to “Soft Light”. This will increase the contrast in the photo and brighten up the colors.
TIP: You can easily duplicate a layer by using the shortcut Ctrl+J or simply go to Image in your toolbar and choose Duplicate from the dropdown menu.
Choose the top layer and duplicate it one time. Change the blending mode of this new layer to “Screen”. This will lighten up your photo quite a bit. At this point your photo will look a little something like this, don’t worry it won’t stay this way for long.

You will now have four layers in this order:
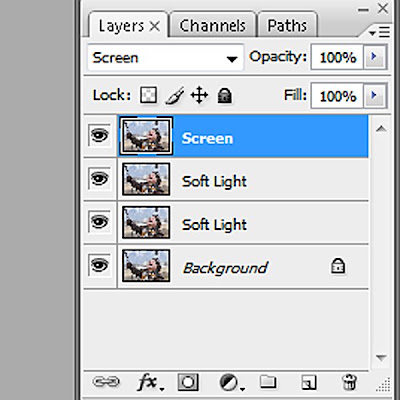
Working with your top layer, which is in “Screen” mode, lower the opacity until you are happy with the results. Every photo is different, but for this photo I lowered the opacity to 20%.
Now, select your third layer which is in “Soft Light” mode. We are going to adjust the saturation just a bit. You can bring up your dialog box by using the shortcut Ctrl+U or go to Image in your toolbar, then select Adjustments from the dropdown menu and finally Hue/Saturation. Leave the Hue alone, you risk ending up with unnatural colors otherwise. Adjust your Saturation slider until you are happy with the results, remember to keep things natural. For my photo I changed the Saturation to +14.
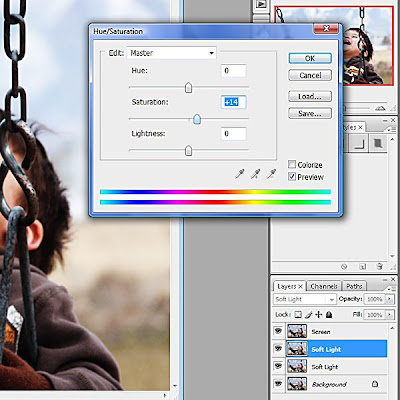
At this point my photo looks like this. It’s better, but still a little washed out and still obviously blurry.

Ok, now let’s see what we can do to sharpen it a little. Select your original photo layer. Go to “Filter” in your toolbar, select “Sharpen” from the dropdown menu then select “Unsharp Mask”.
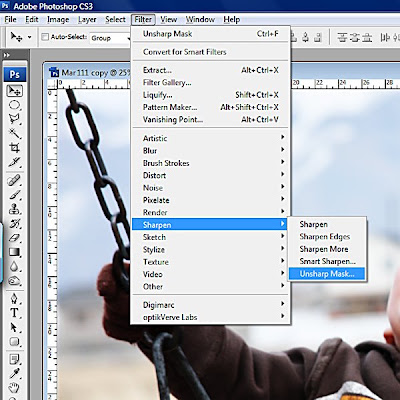
Use caution whenever you sharpen a photo. Sharpening darkens your photo and if you overdo it your picture will look grainy. I used the following settings for my photo- Amount: 72%, Radius: 2 pixels and Threshold: 1 level.

Flatten your image. We have just a few more tweaks. In my opinion the color in the photo is still too washed out. Also, I would really like to draw more attention to his face and away from that extra crisp and sharp chain.
Working with your flatted photo, duplicate it one time and change the blending mode of this new layer to “Multiply” mode. The color has improved, but it is too dark and we’ve lost some detail in the darker parts of the photo. Select the “Elliptical Marquee” tool and feather it in your toolbar, this will help it blend better. The larger the photo, the more you should feather it. My camera is 10 MP, I almost always feather 200 pixels.

Working on the top layer in “Multiply Mode” and with your “Elliptical Marquee” tool active, select the area of your photo that you would like to draw more attention to. In my case I chose his face.

Delete the selected area. Now lower the opacity of the layer until it looks natural and the area of the layer you deleted blends naturally. I lowered mine to 65%, but if it were a darker photo I would probably go as low as 30-40%. If there are any dark areas in your photo that lost too much detail now is the time to adjust it. I like to use the eraser at about 50% opacity with a very soft round brush to lighten these parts of the photo. Only use the eraser tool on your top layer. Do not erase your background photo layer. I chose to lighten his right hand.
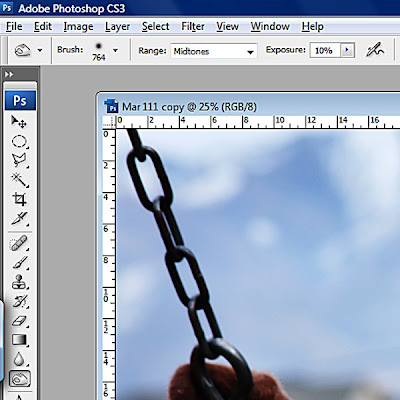
Flatten your image. If you are satisfied with your results, save your picture and you are done. I wanted to darken the edges a little. I chose to use the “Burn” tool. I wanted the effect to be subtle. I used a big and soft round brush set at 10% Exposure and chose Midtones for the Range.
Here is my final picture.

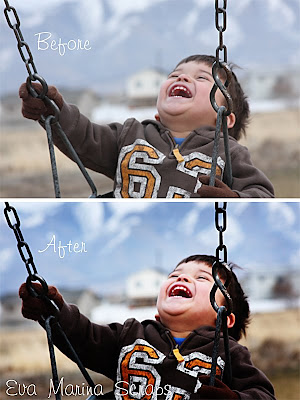
Here are the before and after pictures together… not too shabby, hey?
I hope you found this tutorial helpful. I'd like to post more tutorials in the future, but that probably won't be until the weather starts to cool down a bit. Having too much fun outside right now...
Happy Scrapping!
I’m focusing on saving an “imperfect” photo. We all have them! (I work with Photoshop CS3, I’m not sure if this will work with Photoshop Elements.)
This is what my picture looked like straight out of the camera. It was really overcast so the color is a little washed out. Also, he was in a moving swing and I was shooting with Auto-Focus… as you can see the camera focused on the swing’s chains which left my son looking blurry. Look at that smile though… I had to save this picture!

The first thing you want to do is copy your picture. Take it from me- the last thing you want to do is accidentally save over your original file. Working with your copy, duplicate your photo layer two times and change the blending mode on both layers to “Soft Light”. This will increase the contrast in the photo and brighten up the colors.
TIP: You can easily duplicate a layer by using the shortcut Ctrl+J or simply go to Image in your toolbar and choose Duplicate from the dropdown menu.
Choose the top layer and duplicate it one time. Change the blending mode of this new layer to “Screen”. This will lighten up your photo quite a bit. At this point your photo will look a little something like this, don’t worry it won’t stay this way for long.

You will now have four layers in this order:

Working with your top layer, which is in “Screen” mode, lower the opacity until you are happy with the results. Every photo is different, but for this photo I lowered the opacity to 20%.
Now, select your third layer which is in “Soft Light” mode. We are going to adjust the saturation just a bit. You can bring up your dialog box by using the shortcut Ctrl+U or go to Image in your toolbar, then select Adjustments from the dropdown menu and finally Hue/Saturation. Leave the Hue alone, you risk ending up with unnatural colors otherwise. Adjust your Saturation slider until you are happy with the results, remember to keep things natural. For my photo I changed the Saturation to +14.

At this point my photo looks like this. It’s better, but still a little washed out and still obviously blurry.

Ok, now let’s see what we can do to sharpen it a little. Select your original photo layer. Go to “Filter” in your toolbar, select “Sharpen” from the dropdown menu then select “Unsharp Mask”.

Use caution whenever you sharpen a photo. Sharpening darkens your photo and if you overdo it your picture will look grainy. I used the following settings for my photo- Amount: 72%, Radius: 2 pixels and Threshold: 1 level.

Flatten your image. We have just a few more tweaks. In my opinion the color in the photo is still too washed out. Also, I would really like to draw more attention to his face and away from that extra crisp and sharp chain.
Working with your flatted photo, duplicate it one time and change the blending mode of this new layer to “Multiply” mode. The color has improved, but it is too dark and we’ve lost some detail in the darker parts of the photo. Select the “Elliptical Marquee” tool and feather it in your toolbar, this will help it blend better. The larger the photo, the more you should feather it. My camera is 10 MP, I almost always feather 200 pixels.

Working on the top layer in “Multiply Mode” and with your “Elliptical Marquee” tool active, select the area of your photo that you would like to draw more attention to. In my case I chose his face.

Delete the selected area. Now lower the opacity of the layer until it looks natural and the area of the layer you deleted blends naturally. I lowered mine to 65%, but if it were a darker photo I would probably go as low as 30-40%. If there are any dark areas in your photo that lost too much detail now is the time to adjust it. I like to use the eraser at about 50% opacity with a very soft round brush to lighten these parts of the photo. Only use the eraser tool on your top layer. Do not erase your background photo layer. I chose to lighten his right hand.
Flatten your image. If you are satisfied with your results, save your picture and you are done. I wanted to darken the edges a little. I chose to use the “Burn” tool. I wanted the effect to be subtle. I used a big and soft round brush set at 10% Exposure and chose Midtones for the Range.

Here is my final picture.

Here are the before and after pictures together… not too shabby, hey?

I hope you found this tutorial helpful. I'd like to post more tutorials in the future, but that probably won't be until the weather starts to cool down a bit. Having too much fun outside right now...
Happy Scrapping!
Thursday, August 6, 2009
New Releases at TDC
Mari released Sweetie Pie today, it's the girly counterpart to LuvBug.
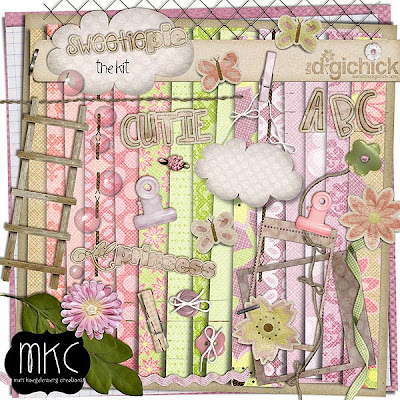
Even though it is girly, you can use it for boys too! This was my son when he was just 12 weeks old.

Have you picked up Mari's Grab Bag yet? It is only $3 and if you sign up for her newsletter you'll get a coupon for $1 off! Let me tell you, it's a great deal and if you are into Speed Scraps you won't want to miss it! She actually released it on her blog, read all about it here.
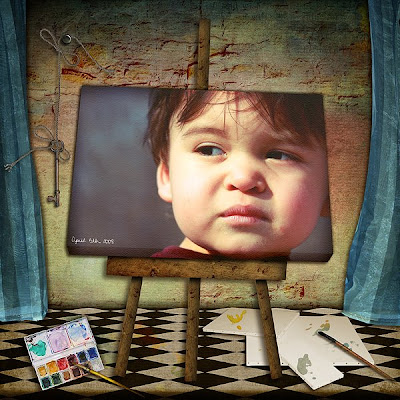
Gypsy Couture released Artists Loft today, it is seriously awesome!

The kit actually includes a lot of canvases, like the one I used for the photo. I've always loved this picture, looks like it was painted. I actually had this picture printed on water color paper and faded the edges, I get tons of compliments on it. This picture also has sentimental value. I took this picture on my first trip to the park with my son after quitting my job. It marks when I became a SAHM, my life changed. I call this layout "My Masterpiece" because he is...
You know, Gypsy Couture's Grab Bag was also released here.
I'll hopefully be releasing new stuff soon. Happy Scrapping!

Even though it is girly, you can use it for boys too! This was my son when he was just 12 weeks old.

Have you picked up Mari's Grab Bag yet? It is only $3 and if you sign up for her newsletter you'll get a coupon for $1 off! Let me tell you, it's a great deal and if you are into Speed Scraps you won't want to miss it! She actually released it on her blog, read all about it here.
Gypsy Couture released Artists Loft today, it is seriously awesome!

The kit actually includes a lot of canvases, like the one I used for the photo. I've always loved this picture, looks like it was painted. I actually had this picture printed on water color paper and faded the edges, I get tons of compliments on it. This picture also has sentimental value. I took this picture on my first trip to the park with my son after quitting my job. It marks when I became a SAHM, my life changed. I call this layout "My Masterpiece" because he is...

You know, Gypsy Couture's Grab Bag was also released here.
I'll hopefully be releasing new stuff soon. Happy Scrapping!
Monday, August 3, 2009
My weekend and some HUGE news!
FPD had their first ever speed scrap on Saturday. It was hosted by Miss Tiina and it was so much fun! Here is my layout:
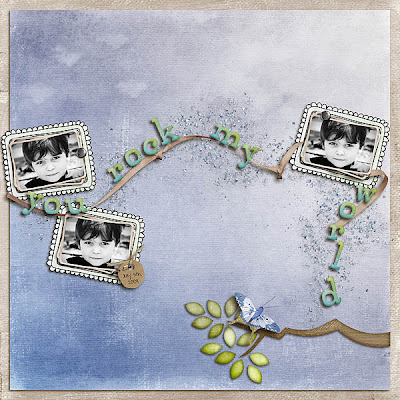
I love how it turned out, you can check out the credits here.
Now... here is some pretty cool news, but it's not the huge news I was talking about. I made this layout using Roxy! and it was published in the August issue of The Artisan Notebook!
Ok... are you curious to know what my HUGE news is? I'm super excited! Click here and read the first post.
Happy Scrapping!

I love how it turned out, you can check out the credits here.
Now... here is some pretty cool news, but it's not the huge news I was talking about. I made this layout using Roxy! and it was published in the August issue of The Artisan Notebook!

Ok... are you curious to know what my HUGE news is? I'm super excited! Click here and read the first post.
Happy Scrapping!
Ready Set Create!
On The Go, June's STS Collab is being featured in August's issue of Ready Set Create magazine. You should check it out!


Route 66 - STS Collab
The STS designers have gotten together for another great collab. The Route 66 Mega Kit includes: 98 papers, 213 elements, 3 alphas and 3 brag book templates!


The Route 66 Brag Book includes 35 5x7 BB pages.


The Route 66 Brag Book includes 35 5x7 BB pages.

Saturday, August 1, 2009
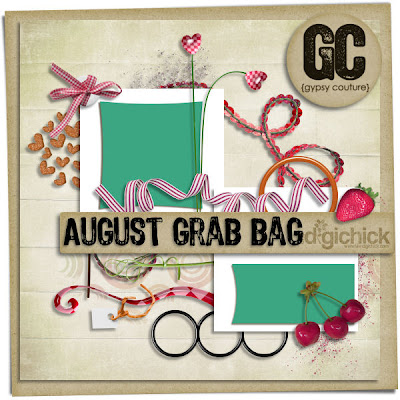
It's Grab Bag time at TDC!
Woo Hoo! I love it! TDC designers just released 12, yes twelve, grab bags. They are always such a good deal. Most of them are only $3 and they are worth so much more.
Here is the preview of Mari's bag:
Here is my layout:
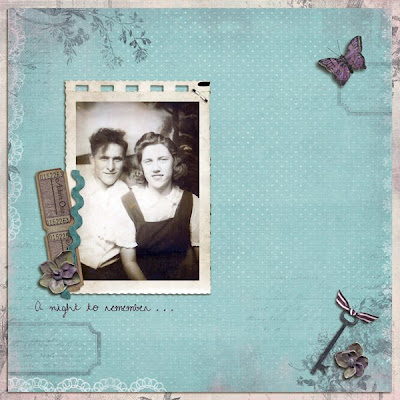
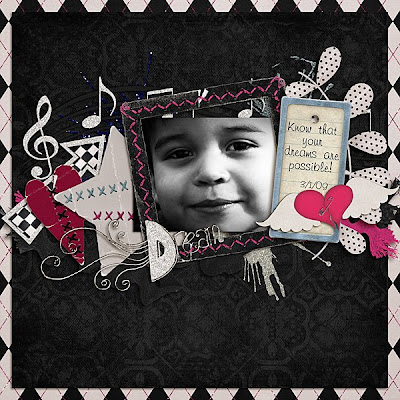
This is the preview to Gypsy Couture's bag:
And here is the layout I made with it:

I'm sure I'll be picking up some more...
Here is the preview of Mari's bag:

Here is my layout:

This is the preview to Gypsy Couture's bag:

And here is the layout I made with it:

I'm sure I'll be picking up some more...
Subscribe to:
Posts (Atom)


