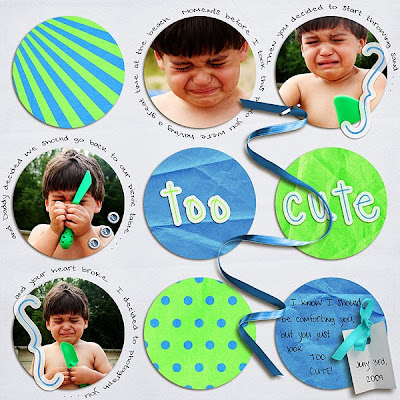
Step 1: Choose 3 or 4 photos. Crop them into circles. The circles can be the same size or different sizes. Your choice.
Step 2: If you chose 3 photos, choose 6 papers. If you chose 4 photos, choose 5 papers. Crop them into circles. The circles can be the same size or different sizes, and the papers can be patterned, or solids, or a combination of both. Your choice. You will have a total of 9 circles!
Step 3: Journal IN two papers and AROUND one paper. Journal AROUND 2 photos. Link or group the photo/paper and journaling so you can move them around.
Tutorial on how to journal around a shape: http://www.photoshopessentials.com/photoshop-text/photoshop-text-path.php
Tutorial on how to journal in a shape: http://www.digitalscrapbookplace.com/uni....nshape_as.shtml
Step 4: Add a title IN one paper circle, using an alpha somewhere in the title. Link or group the paper and the text together so you can move it around.
Step 5: Arrange your 9 circles how you would like, leaving the background white
Step 6: Add the following embellishments: a tag, a bracket, a brad (or button), a string (or ribbon) After you have added these embellishments, you can add additional ones if you need or want!
Step 7: Add a date (if you did not in the journaling), drop shadows (if needed) Upload your LO to the STS gallery, and post a link back in the forum so we can leave some love!
Luckily I already had these photos edited. I took a little creative liberty, by journaling around my photos and not around the papers. I used my new kit 1-2-3 Blow! Don't forget it's only $2 through Monday night.


1 comment:
great LO! Love your work. :)
Post a Comment